1.iTerm2 설치
1. 공식홈페이지
2. 테마
iTerm2-Color-Schemes 이 곳에서 스크린샷을 보며 선택 가능
원하는 테마를 찾은 후 schemes에서 찾아서 다운


Raw 클릭

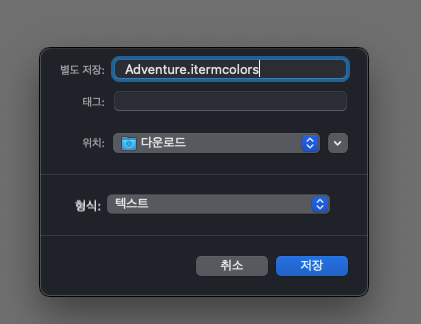
우클릭 다른이름으로 저장 확장자에서 .txt를 지우고 저장

preferences -> profiles -> color 우측 아래 color presets에서 import 해서 적용

3. zsh 설치
1. homebrew
brew install zsh
2. curl
sh -c "$(curl -fsSL https://raw.githubusercontent.com/ohmyzsh/ohmyzsh/master/tools/install.sh)"
3. 테마 변경
visula studio code 설치 된 상태
code ~/.zshrc
ZSH_THEME = "agnoster" 로 변경 (깃 상태 등을 알려줌)

4. 폰트 설치
iTerm 테마 설정 해준 것처럼 preferences -> profiles -> text 에서 설정

4. 사용자명 뒤 @macbook-pro 삭제
code ~/.zshrc
하단에 아래 코드 추가
prompt_context() {
  if [[ "$USER" != "$DEFAULT_USER" || -n "$SSH_CLIENT" ]]; then
    prompt_segment black default "%(!.%{%F{yellow}%}.)$USER"
  fi
}
5. 줄바꿈 상태로 바꾸기

agnoster 테마 사용시
code ~/.oh-my-zsh/themes/agnoster.zsh-theme
theme 파일의 build_prompt 내의 promt_end 바로 위에 prompt_newline 추가
## Main prompt
build_prompt() {
  RETVAL=$?
  prompt_status
  prompt_virtualenv
  prompt_aws
  prompt_context
  prompt_dir
  prompt_git
  prompt_bzr
  prompt_hg
  prompt_newline
  prompt_end
}
그리고 하단에 prompt_newline 정의 추가
prompt_newline() {
  if [[ -n $CURRENT_BG ]]; then
    echo -n "%{%k%F{$CURRENT_BG}%}$SEGMENT_SEPARATOR
%{%k%F{blue}%}$SEGMENT_SEPARATOR"
  else
    echo -n "%{%k%}"
  fi

  echo -n "%{%f%}"
  CURRENT_BG=''
}
5. zsh syntax highlightin
터미널에서 아래 코드 추가
git clone https://github.com/zsh-users/zsh-syntax-highlighting.git ${ZSH_CUSTOM:-~/.oh-my-zsh/custom}/plugins/zsh-syntax-highlighting
code ~/.zshrch
plugins 부분에 zsh-syntax-highlighting 추가
plugins=( [plugins...] zsh-syntax-highlighting)
6. zsh 자동완성
터미널에서 아래 코드 추가
git clone https://github.com/zsh-users/zsh-autosuggestions ~/.zsh/zsh-autosuggestions
plugins 부분에 zsh-autosuggestions 추가
plugins=( [plugins...] zsh-autosuggestions )
728x90