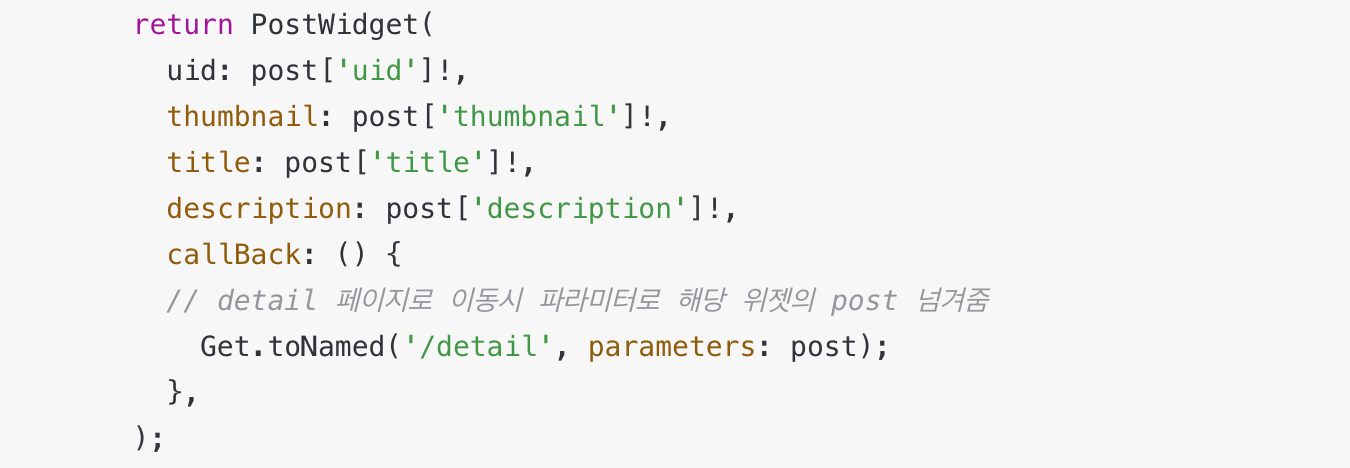
SingleGetTickerProviderMixin 를 mixin한 GetxController를 상속받은 컨트롤러 만들기

animation을 사용하기위해 SingleGetTickerProviderMixin를 가져옴

class TextAnimation extends GetxController with SingleGetTickerProviderMixin {
  Map<String, String?>? post;

  AnimationController? animationController;
  Animation<Offset>? animationOffset;

  @override
  void onInit() {
    super.onInit();
    animationController = AnimationController(
      vsync: this,
      duration: const Duration(milliseconds: 1000),
    );
    final curve =
        CurvedAnimation(parent: animationController!, curve: Curves.bounceIn);
    animationOffset = Tween<Offset>(
            begin: const Offset(0.0, -1.0), end: const Offset(0.0, 0.0))
        .animate(curve);
    animationController!.repeat();
    _loadData();
  }

  void _loadData() {
    post = Get.parameters;
  }
}

실제 사용

아래와 같이 statefull에서 사용하던 방법처럼 animation 부분에 controller에서 만든 animation을 가져오면 됨

class PostDetailView extends GetView<TextAnimation> {
  const PostDetailView();

  @override
  Widget build(BuildContext context) {
    Get.put(TextAnimation());
    return Scaffold(
      appBar: AppBar(
        title: Text(controller.post!['title']!),
      ),
      body: Column(
        children: [
          Hero(
              tag: controller.post!['uid']!,
              child: Image.asset(controller.post!['thumbnail']!)),
          Column(
            children: [
            // 아래와 같이 controller에서 애니메이션을 가져오면 됨
              SlideTransition(
                position: controller.animationOffset!,
                child: Text(
                  controller.post!['title']!,
                ),
              ),
              Text(
                controller.post!['description']!,
              ),
            ],
          ),
        ],
      ),
    );
  }
}
728x90

Json 데이터 예시

[
    {
        "uid" : 1,
        "thumbnail": "assets/images/1.jpg",
        "title" : "꼬북좌 이미지1",
        "description" : "남심 '저격'브레이브걸스 유정 근황"
    },
    {
        "uid" : 2,
        "thumbnail": "assets/images/2.jpg",
        "title" : "꼬북좌 이미지2",
        "description" : "브레이브걸스 꼬북좌 유정 사진짤 방출"
    },
    {
        "uid" : 3,
        "thumbnail": "assets/images/3.jpg",
        "title" : "꼬북좌 이미지3",
        "description" : "예상치 못한 인스타에 팬들 반응 난리났다."
    },
    {
        "uid" : 4,
        "thumbnail": "assets/images/4.jpg",
        "title" : "꼬북좌 이미지4",
        "description" : "꼬북좌 인스타 이미지"
    },
    {
        "uid" : 5,
        "thumbnail": "assets/images/5.jpg",
        "title" : "진짜 꼬부기",
        "description" : "진짜 꼬부기 이미지"
    }
]

GetxController를 상속 받아 Json 데이터를 가져오는 컨트롤러

class JsonLoader extends GetxController {
  static JsonLoader get to => Get.find();
  var list = <Map<String, dynamic>>[].obs;
  @override
  void onInit() async {
    super.onInit();
    _loadJsonFile();
  }

  void _loadJsonFile() async {
    if (Get.context != null) {
      String data = await DefaultAssetBundle.of(Get.context!)
          .loadString("assets/json/post.json");
      list(json.decode(data).cast<Map<String, dynamic>>().toList());
    } else {
      Future.delayed(Duration(milliseconds: 200), _loadJsonFile);
    }
  }
}

SingleChildScrollView로 GetX의 Obx로 Json 데이터 리스트 위젯 만들기

SingleChildScrollView(
  child: Obx(
    () => Column(
      children: List.generate(
        JsonLoader.to.list.length,
        (index) {
        // 부모에서 JsonLoader binding
        // 컨트롤러에서 만든 리스트를 post에 저장
          var post = JsonLoader.to.list[index]
              .map<String, String>((key, value) {
            return MapEntry(key.toString(), value.toString());
          });
          return PostWidget(
            uid: post['uid']!,
            thumbnail: post['thumbnail']!,
            title: post['title']!,
            description: post['description']!,
            callBack: () {
            // detail 페이지로 이동시 파라미터로 해당 위젯의 post 넘겨줌
              Get.toNamed('/detail', parameters: post);
            },
          );
        },
      ),
    ),
  ),
)

리스트의 아이템 만들기

typedef PostClickFunction = void Function();

class PostWidget extends StatelessWidget {
  final String uid;
  final String thumbnail;
  final String title;
  final String description;
  final PostClickFunction callBack;

  const PostWidget(
      {required this.uid,
      required this.thumbnail,
      required this.title,
      required this.description,
      required this.callBack});

  @override
  Widget build(BuildContext context) {
    return GestureDetector(
      onTap: callBack,
      child: Container(
        child: Column(
          crossAxisAlignment: CrossAxisAlignment.stretch,
          children: [
            Image.asset(thumbnail),
            Padding(
              padding: const EdgeInsets.only(
                  top: 10, bottom: 20, left: 10, right: 10),
              child: Column(
                crossAxisAlignment: CrossAxisAlignment.stretch,
                children: [
                  Text(
                    title,
                    style: TextStyle(fontSize: 15, fontWeight: FontWeight.bold),
                  ),
                  Text(
                    description,
                    style: TextStyle(
                      fontSize: 12,
                    ),
                  )
                ],
              ),
            ),
          ],
        ),
      ),
    );
  }
}

callback을 통해 디테일 페이지로 이동

리스트 위젯의 callback 부분에 Get.toNamed로 최상단에 지정한 라우팅 주소 넣고, 파라미터로 데이터 넘겨주기

GetxController를 통해 파라미터 받아오기

class TextAnimation extends GetxController {
  Map<String, String?>? post;

  @override
  void onInit() {
    super.onInit();
    _loadData();
  }

  void _loadData() {
    post = Get.parameters;
  }
}

위에서 만든 GetxController 형식의 GetView를 상속받아 파라미터의 데이터 가져오기

class PostDetailView extends GetView<TextAnimation> {
  const PostDetailView();

  @override
  Widget build(BuildContext context) {
    return Scaffold(
      appBar: AppBar(
        title: Text(controller.post!['title']!),
      ),
      body: Column(
        children: [
          Image.asset(controller.post!['thumbnail']!),
          Column(
            children: [
              Text(
                controller.post!['title']!,
              ),
              Text(
                controller.post!['description']!,
              ),
            ],
          ),
        ],
      ),
    );
  }
}
728x90

controller가 singleton 방식인 것을 활용

기존

controller

class CountControllerWithGetX extends GetxController {
  int count = 0;
  void increase(String id) {
    count++;
    update([id]);
  }
}

contoller에 접근

Get.find<CountControllerWithGetX>().increase();

활용

controller에 state으로 get to 추가

class CountControllerWithGetX extends GetxController {
  static CountControllerWithGetX get to => Get.find();
  int count = 0;
  void increase(String id) {
    count++;
    update([id]);
  }
}

controller.to 로 접근 가능

CountControllerWithGetX.to.increase();

controller가 reactive 방식일때 stateless 대신 getview를 사용해서 접근

stateless -> GetView로 변경

// stateless -> GetView로 변경
class BindingPage extends GetView<CountControllerWithReactive> {
  const BindingPage({Key? key}) : super(key: key);

  @override
  Widget build(BuildContext context) {
    return Scaffold(
      appBar: AppBar(),
      body: Column(
        children: [
          Text(
            "GetX",
            style: TextStyle(fontSize: 50),
          ),
                    // reactive 방식이어야함
          Obx(() => Text(
                "${controller.count.value}",
                style: TextStyle(fontSize: 50),
              )),
          RaisedButton(
            onPressed: () {
              //GetView 안에 controller가 있음
              controller.increase();
            },
            child: Text(
              "+",
              style: TextStyle(fontSize: 50),
            ),
          ),
        ],
      ),
    );
  }
}

참고

https://www.youtube.com/watch?v=O1Bw-mwF9xc 


728x90

의존성 주입 (binding)

controller를 인스턴스화 하는 방법 ( 의존성 주입 )

put, lazyput, putasync, create 방법이 있음

binding 방법

특정 페이지 안에서 특정 페이지로 이동할때 바인딩

Get.put

  • 페이지 이동시 create, initialized 되고 페이지에서 나올때 delete()가 실행되며 메모리에서 삭제
RaisedButton(
  child: Text("GetPut"),
  onPressed: () {
    //바인딩 : 페이지로 보내주면서 사용할 컨트롤러를 주입하는 방법
    Get.to(
      GetPut(),
      binding: BindingsBuilder(() {
        Get.put(DependencyController());
        //put방식은 페이지 이동시 controller를 메모리에 올려주고 나올땐 알아서 삭제해줌
      }),
    );
  },
),

Get.lazyPut

  • 버튼을 눌러 페이지 이동했을 당시에는 create, initialized되지 않지만 사용할때 생성됨
  • 나올때는 put과 동일하게 삭제
RaisedButton(
  child: Text("Get.lazyPut"),
  onPressed: () {
    Get.to(
      GetLazyPut(),
      binding: BindingsBuilder(() {
        // controller를 사용할때 메모리에 올려줌
        // 나올땐 삭제
        Get.lazyPut<DependencyController>(
            () => DependencyController());
      }),
    );
  },
),

Get.putAsync

  • 페이지에 접근을 할때 비동기식으로 데이터를 받아오거나 가공처리를 오랫동안하고 나서 컨트롤러를 인스턴스화 할때 사용
RaisedButton(
  child: Text("Get.putAsync"),
  onPressed: () {
    Get.to(
      GetPut(),
      binding: BindingsBuilder(() {
        // 페이지에 접근을 할때 비동기식으로 데이터를 받아오거나 가공처리를 오랫동안하고 나서 컨트롤러를 인스턴스화 할때 사용
        Get.putAsync<DependencyController>(() async {
          // 데이터 처리 후 인스턴스화
          await Future.delayed(Duration(seconds: 5));
          return DependencyController();
        });
      }),
    );
  },
),

Get.create

  • 페이지 이동 할 당시에는 생성 안되지만 사용할때 마다 생성됨
  • 자동으로 삭제되지 않기 때문에 사용 종료때마다 삭제 해줘야함
RaisedButton(
  child: Text("Get.create"),
  onPressed: () {
    // 인스턴스를 여러개 생성
    Get.to(GetPut(), binding: BindingsBuilder(() {
      // 사용할때성 마다 인스턴스 생성
      Get.create<DependencyController>(
          () => DependencyController());
    }));
  },
),

앱이 실행될 때 가장 앞에서 바인딩 설정

  • 라우팅 설정의 GetPage안에서 설정
getPages: [
  GetPage(
    name: '/binding',
    page: () => BindingPage(),
    binding: BindingsBuilder(() {
      Get.put(CountControllerWithGetX());
    }),
  ),
],

Bindings를 implements한 클래스를 만들어서 getPages의 binding에 넣어줄 수 있음

class BindingPageBinding implements Bindings {
  @override
  void dependencies() {
    // TODO: implement dependencies
    Get.put(CountControllerWithGetX());
  }
}
GetPage(
  name: '/binding',
  page: () => BindingPage(),
  binding: BindingPageBinding(),
),

참고

https://www.youtube.com/watch?v=KDTjo-6jFKs 


728x90

값이 변경되어야만 update (rebuild)를 합니다.

현재 상태값과 변경될 상태값이 동일하다면 wiget을 다시 그리지 않습니다.

controller

class CountControllerWithReactive {
  RxInt count = 0.obs; // 반응형 상태관리
  void increase() {
    count++;
  }

    // 값을 넣어 줄때
  void putNumber(int value) {
    count(value);
  }
}

ui

class ReactiveSimpleStatePage extends StatelessWidget {
  const ReactiveSimpleStatePage({Key? key}) : super(key: key);

  @override
  Widget build(BuildContext context) {
    Get.put(CountControllerWithReactive());
    return Scaffold(
        appBar: AppBar(
          title: Text('반응형 상태 관리'),
        ),
        body: Center(
          child: Column(
            mainAxisAlignment: MainAxisAlignment.center,
            children: [
              Text(
                "GetX",
                style: TextStyle(fontSize: 50),
              ),
                            // 현재 값이 5인 경우 putNumber(5)를 아무리 눌러도 다시 그려지지 않음
              Obx(() => Text(
                    "${Get.find<CountControllerWithReactive>().count.value}",
                    style: TextStyle(fontSize: 50),
                  )),
              RaisedButton(
                onPressed: () {
                  Get.find<CountControllerWithReactive>().increase();
                },
                child: Text(
                  "+",
                  style: TextStyle(fontSize: 50),
                ),
              )
              RaisedButton(
                onPressed: () {
                  Get.find<CountControllerWithReactive>().putNumber(5);
                },
                child: Text(
                  "5로 변경",
                  style: TextStyle(fontSize: 50),
                ),
              ),
            ],
          ),
        ));
  }
}

이벤트 트리거

controller

import 'package:get/get.dart';

// trigger를 위해 getxcontroller 상속
class CountControllerWithReactive extends GetxController {
  RxInt count = 0.obs; // 반응형 상태관리
  void increase() {
    count++;
  }

  void putNumber(int value) {
    count(value);
  }

  // getxcontroller lifecycle
  @override
  void onInit() {
    // TODO: implement onInit
    // worker
    // 매번 값이 변경될 때 마다 호출 (반응 상태일때만 가능)
    ever(count, (_) => print("매번 호출"));
    // 한번만 호출
    once(count, (_) => print("한번만 호출"));
    // 이벤트가 끝났을때 실행
    debounce(count, (_) => print("마지막 변경에 한번만 호출"), time: Duration(seconds: 1));
    // 변경되고 있는 동안 설정한 초마다 실행
    interval(count, (_)=>print("변경되고 있는 동안 1초마다 호출"),time: Duration(seconds: 1));
    super.onInit();
  }

  @override
  void onClose() {
    // TODO: implement onClose
    super.onClose();
  }
}

custom Rx 타입

enum 타입

enum NUM {FIRST, SECOND}
class controller {
    Rx<NUM> nums = NUM.FIRST.obs;

    void put(){
        nums(NUM.SECOND);
    }
}

class 타입

class User{
    String name;
    int age;
}
class controller {
    Rx<User> user = User().obs;

    void put(){
        user(User());
        user.update((_user){
            _user.name = 'name';
        });
    }
}

list 타입

class controller {
    RxList<String> list = [].obs;
    void put(){
        list.addAll();
        list.add();
        list.addIf(user.value.name=='name','okay'); // 조건, 대입값
    }
}


참고

https://www.youtube.com/watch?v=TjC1ka8fZJw 


728x90

단순 상태 관리 앱 화면

main(controller 등록)

class SimpleStatePage extends StatelessWidget {
  const SimpleStatePage({Key? key}) : super(key: key);

  @override
  Widget build(BuildContext context) {
        // getx controller 등록
        Get.put(CountControllerWithGetX());
    return Scaffold(
        appBar: AppBar(
          title: Text('단순 상태 관리'),
        ),
        body: Center(
          child: Column(
            mainAxisAlignment: MainAxisAlignment.center,
            children: [
              Expanded(child: WithGetX()),
              Expanded(
                                    // provider controller 등록
                  child: ChangeNotifierProvider<CountControllerWithProvider>(
                create: (_) => CountControllerWithProvider(),
                child: WithProvider(),
              )),
            ],
          ),
        ));
  }
}

Provider

controller

class CountControllerWithProvider extends ChangeNotifier {
  int count = 0;
  void increase() {
    count++;
    notifyListeners();
  }
}

ui

class WithProvider extends StatelessWidget {
  const WithProvider({Key? key}) : super(key: key);

  @override
  Widget build(BuildContext context) {
    return Center(
      child: Column(
        children: [
          Text(
            "Provider",
            style: TextStyle(fontSize: 50),
          ),
          Consumer<CountControllerWithProvider>(
            builder: (_, snapshot, child) {
              return Text("${snapshot.count}", style: TextStyle(fontSize: 50));
            },
          ),
          RaisedButton(
            onPressed: () {
              // listen: false를 줘서 consumer 부분만 rebuild
              Provider.of<CountControllerWithProvider>(context, listen: false)
                  .increase();
            },
            child: Text(
              "+",
              style: TextStyle(fontSize: 50),
            ),
          ),
        ],
      ),
    );
  }
}

GetX

controller

class CountControllerWithGetX extends GetxController {
  int count = 0;
  void increase() {
    count++;
    update();
  }
}

ui

class WithGetX extends StatelessWidget {
  const WithGetX({Key? key}) : super(key: key);

  @override
  Widget build(BuildContext context) {
    return Center(
      child: Column(
        mainAxisAlignment: MainAxisAlignment.center,
        children: [
          Text(
            "GetX",
            style: TextStyle(fontSize: 50),
          ),
          GetBuilder<CountControllerWithGetX>(builder: (controller) {
            return Text(
              "${controller.count}",
              style: TextStyle(fontSize: 50),
            );
          }),
          RaisedButton(
            onPressed: () {
              Get.find<CountControllerWithGetX>().increase();
            },
            child: Text(
              "+",
              style: TextStyle(fontSize: 50),
            ),
          ),
        ],
      ),
    );
  }
}

비교

Provider는 consumer를 이용해 상태값을 가져오고 provider와 context를 이용해 controller의 비즈니스 로직을 불러옵니다.

GetX는 GetBuilder를 통해 상태값을 가져오고 Get.find를 통해 controller의 비즈니스 로직을 가져옵니다.

context를 사용하지 않는 GetX 방식은 위젯으로 분리하여 사용가능합니다.

...{
    ...
    return (
    ...,
    buildRaisedButton(),
    );

    Widget buildRaisedButton() {
      return RaisedButton(
        onPressed: () {
          Get.find<CountControllerWithGetX>().increase();
        },
        child: Text(
          "+",
          style: TextStyle(fontSize: 50),
        ),
      );
    }

}

반면, provider의 경우에는 stateful 위젯으로 변경하거나 context를 넘져워야합니다.

    buildRaisedButton(context),
            ],
          ),
        );
      }

  Widget buildRaisedButton(BuildContext context) {
    return RaisedButton(
          onPressed: () {
            // listen: false를 줘서 consumer 부분만 rebuild
            Provider.of<CountControllerWithProvider>(context, listen: false)
                .increase();
          },
          child: Text(
            "+",
            style: TextStyle(fontSize: 50),
          ),
        );
  }
}

GetX는 선언이 자유롭다.

부모에서 controller를 선언해줄 필요가 없습니다.

ui 부분에서 바로 사용 가능

class WithGetX extends StatelessWidget {
  const WithGetX({Key? key}) : super(key: key);

  @override
  Widget build(BuildContext context) {
        // 바로 사용 가능
        Get.put(CountControllerWithGetX());
    return Center(
      child: Column(
        mainAxisAlignment: MainAxisAlignment.center,
        children: [
          Text(
            "GetX",
            style: TextStyle(fontSize: 50),
          ),
          GetBuilder<CountControllerWithGetX>(builder: (controller) {
            return Text(
              "${controller.count}",
              style: TextStyle(fontSize: 50),
            );
          }),
          RaisedButton(
            onPressed: () {
              Get.find<CountControllerWithGetX>().increase();
            },
            child: Text(
              "+",
              style: TextStyle(fontSize: 50),
            ),
          ),
        ],
      ),
    );
  }
}

또한 클래스가 생성될때 바로 사용가능합니다.

class WithGetX extends StatelessWidget {
  const WithGetX({Key? key}) : super(key: key);
    // 클래스가 생성될때 바로 사용가능
    CountControllerWithGetX _countControllerWithGetX =Get.put(CountControllerWithGetX());
  @override
  Widget build(BuildContext context) {

    return Center(
      child: Column(
        mainAxisAlignment: MainAxisAlignment.center,
        children: [
          Text(
            "GetX",
            style: TextStyle(fontSize: 50),
          ),
          GetBuilder<CountControllerWithGetX>(builder: (controller) {
            return Text(
              "${controller.count}",
              style: TextStyle(fontSize: 50),
            );
          }),
          RaisedButton(
            onPressed: () {
                            //find를 할 필요가 없음
              _countControllerWithGetX.increase();
            },
            child: Text(
              "+",
              style: TextStyle(fontSize: 50),
            ),
          ),
        ],
      ),
    );
  }
}

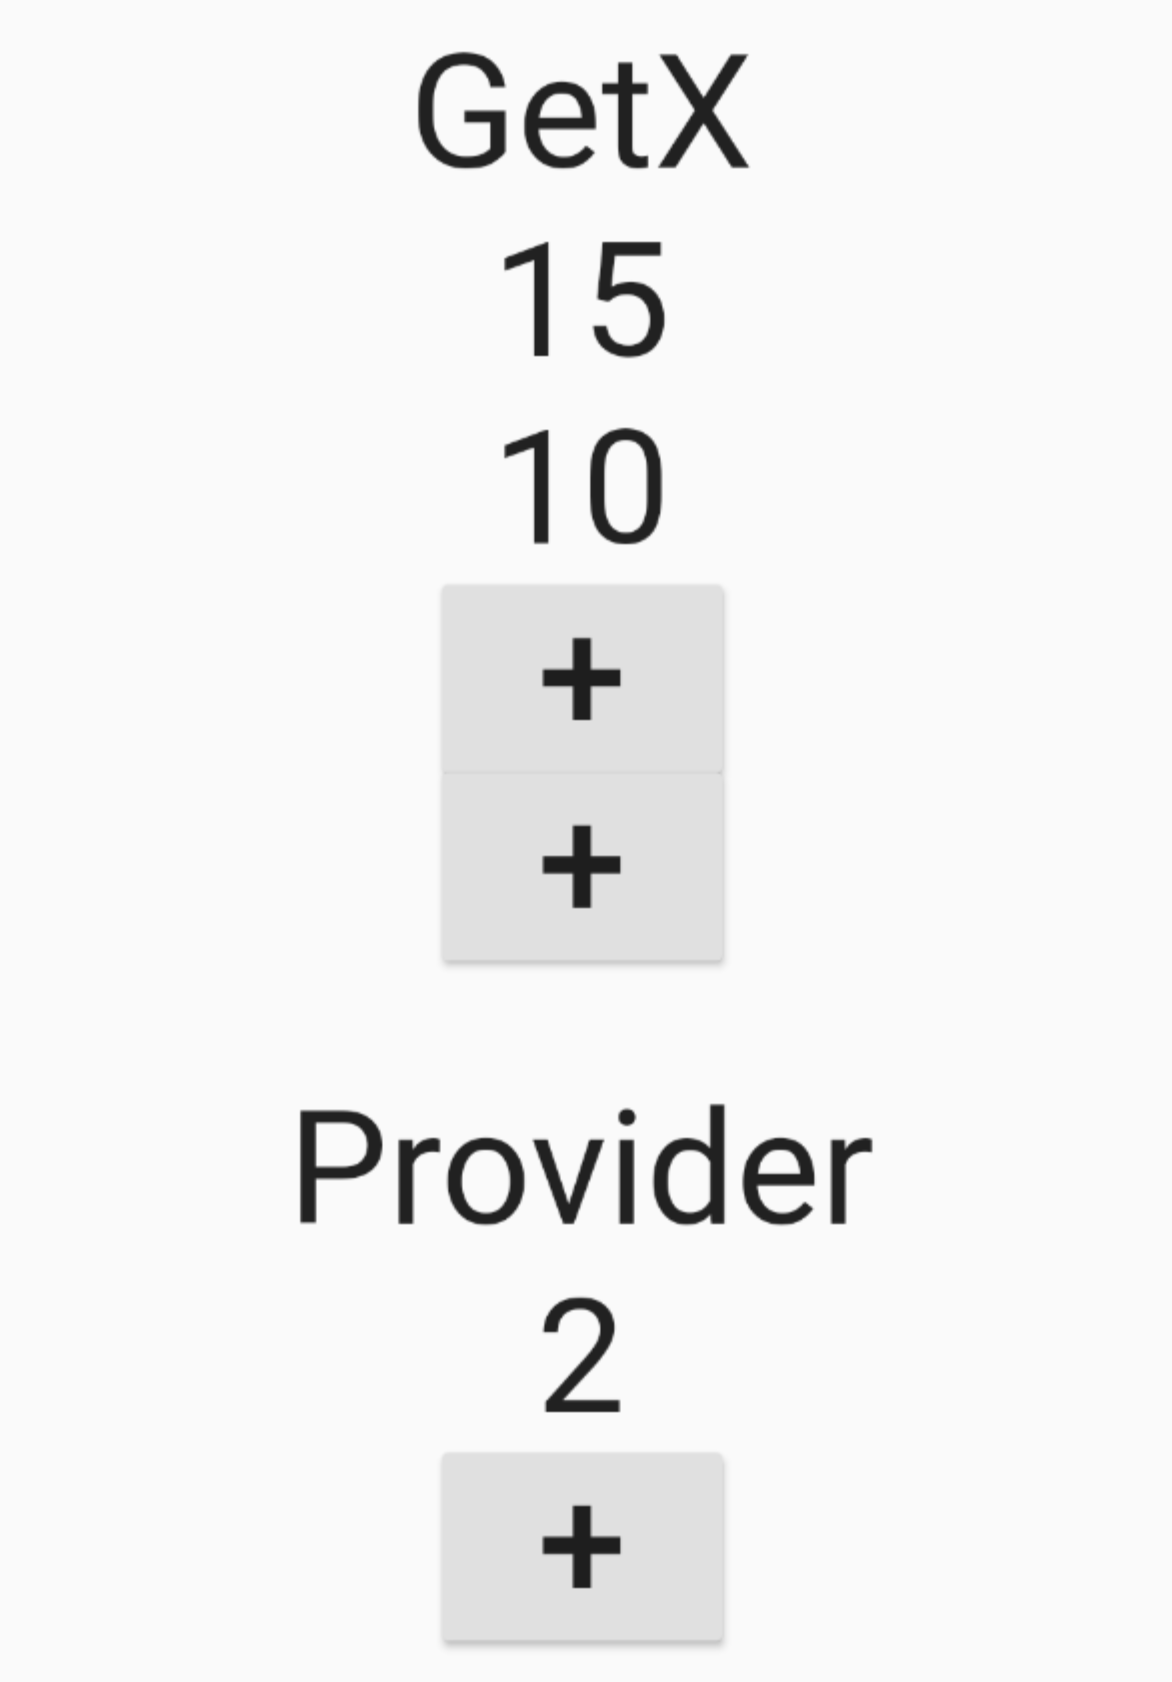
특정 컨트롤러에 아이디를 부여해서 관리 가능

cotroller

class CountControllerWithGetX extends GetxController {
  int count = 0;
    // id를 받아서 update에 배열로 넣어줌
  void increase(String id) {
    count++;
    update([id]);
  }
}

ui

class WithGetX extends StatelessWidget {
  WithGetX({Key? key}) : super(key: key);
  CountControllerWithGetX _countControllerWithGetX =
      Get.put(CountControllerWithGetX());

  @override
  Widget build(BuildContext context) {
    return Center(
      child: Column(
        mainAxisAlignment: MainAxisAlignment.center,
        children: [
          Text(
            "GetX",
            style: TextStyle(fontSize: 50),
          ),
          GetBuilder<CountControllerWithGetX>(
                        // id 추가
            id: "first",
            builder: (controller) {
              return Text(
                "${controller.count}",
                style: TextStyle(fontSize: 50),
              );
            },
          ),
          GetBuilder<CountControllerWithGetX>(
            id: "second",
            builder: (controller) {
              return Text(
                "${controller.count}",
                style: TextStyle(fontSize: 50),
              );
            },
          ),
          buildRaisedButton("first"),
          buildRaisedButton("second"),
        ],
      ),
    );
  }

  Widget buildRaisedButton(String id) {
    return RaisedButton(
      onPressed: () {
                // id를 넘겨줌
        _countControllerWithGetX.increase(id);
      },
      child: Text(
        "+",
        style: TextStyle(fontSize: 50),
      ),
    );
  }
}

참고

https://www.youtube.com/watch?v=k3hgQu6it4c 


728x90

+ Recent posts