BLOC

Bussiness Logic Component

비즈니스 로직과 ui를 구분 짓고 필요에 따라 원하는 부분만 데이터 처리

실 사용 예제

버튼 클릭시 증감

1. Stateful version

ui widget - 버튼 클릭시 증감

//stateless widget으로 count를 보내 화면에 그려줌
body: CountViewStateless(count: count),
floatingActionButton: Row(
  mainAxisAlignment: MainAxisAlignment.end,
  children: [
    IconButton(
      icon: Icon(Icons.add),
      onPressed: () {
        setState(() {
          count++;
        });
      },
    ),
    IconButton(
      icon: Icon(Icons.remove),
      onPressed: () {
        setState(() {
          count--;
        });
      },
    ),
  ],
),

view - 결과 출력

import 'package:flutter/material.dart';

class CountViewStateless extends StatelessWidget {
  int count;
  CountViewStateless({Key key, this.count}) : super(key: key);

  @override
  Widget build(BuildContext context) {
    print("CountViewStateless Build !!");
    return Center(
        child: Text(
      count.toString(),
      style: TextStyle(fontSize: 80),
    ));
  }
}

2. bloc pattern

ui widget - 값을 변경시키는 이벤트 발생

// 전역변수로 bloc 생성
CountBloc countBloc;

class _BlocDisplayWidgetState extends State<BlocDisplayWidget> {
  @override
  void initState() {
    super.initState();
        // bloc
    countBloc = CountBloc();
  }

  @override
  void dispose() {
    super.dispose();
        // bloc 종료
    countBloc.dispose();
  }

  @override
  Widget build(BuildContext context) {
    return Scaffold(
      appBar: AppBar(
        title: Text("bloc 패턴"),
      ),
      body: CountView(),
      floatingActionButton: Row(
        mainAxisAlignment: MainAxisAlignment.end,
        children: [
          IconButton(
            icon: Icon(Icons.add),
            onPressed: () {
                            // add는 이벤트를 등록한다는 의미
                            // 숫자를 더하거나 빼는 로직이 현재파일에는 존재하지 않음
              countBloc.countEventBloc.countEventSink.add(CountEvent.ADD_EVENT);
            },
          ),
          IconButton(
            icon: Icon(Icons.remove),
            onPressed: () {
              countBloc.countEventBloc.countEventSink
                  .add(CountEvent.SUBTRACT_EVENT);
            },
          ),
        ],
      ),
    );
  }
}

count_bloc - 비즈니스 로직 처리

import 'dart:async';

//bloc
class CountBloc {
  CountEventBloc countEventBloc = CountEventBloc();
  int _count = 0;
    // broadcast를 넣어주면 여러군데에서 구독 가능
  final StreamController<int> _countSubject = StreamController<int>.broadcast();

    // count는 _countSubject.stream를 구독하고 있는 모든 widget에게 변경된 상태값을 전달
  Stream<int> get count => _countSubject.stream;

    // 생성자
  CountBloc() {
        // countEventBloc의 _countEventSubject을 구독
    countEventBloc._countEventSubject.stream.listen(_countEventListen);
  }
    // 생성자에서 변화를 감지하여 listen으로 리턴 받은 것
    // 인자값 event에 해당하는 것은 enum에 등록된 이벤트 
  _countEventListen(CountEvent event) {
        // 비즈니스 로직 부분
    switch (event) {
      case CountEvent.ADD_EVENT:
        _count++;
        break;
      case CountEvent.SUBTRACT_EVENT:
        _count--;
        break;
    }
        // 결과값인 _count를 sink에 add로  넣어줌 
    _countSubject.sink.add(_count);
  }

  dispose() {
    _countSubject.close();
    countEventBloc.dispose();
  }
}

// event 
class CountEventBloc {
  final StreamController<CountEvent> _countEventSubject =
      StreamController<CountEvent>();
    // event 값이 sink로 들어오면 _countEventSubject를 통해 구독자에게 알려줌  
  Sink<CountEvent> get countEventSink => _countEventSubject.sink;

  dispose() {
    _countEventSubject.close();
  }
}

// event에 해당하는 enum
enum CountEvent { ADD_EVENT, SUBTRACT_EVENT }

count_view 결과값 받아오는 곳

StreamBuilder(
    // stream을 리스닝 
  stream: countBloc.count, // Stream<int> get count => _countSubject.stream; 구독
  initialData: 0,
    // snapshot으로 값이 들어옴
  builder: (BuildContext context, AsyncSnapshot<int> snapshot) { 
    if (snapshot.hasData) {
      return Text(
        snapshot.data.toString(),
        style: TextStyle(fontSize: 80),
      );
    }
    return CircularProgressIndicator();
  },
),

3. Skip event bloc pattern

ui 위와 다르게 바로 이벤트 호출함

class _BlocDisplayWidgetState extends State<BlocDisplayWidget> {
  @override
  void initState() {
    super.initState();
    countBloc = CountBloc();
  }

  @override
  void dispose() {
    super.dispose();
    countBloc.dispose();
  }

  @override
  Widget build(BuildContext context) {
    return Scaffold(
      appBar: AppBar(
        title: Text("bloc 패턴"),
      ),
      body: CountView(),
      floatingActionButton: Row(
        mainAxisAlignment: MainAxisAlignment.end,
        children: [
          IconButton(
            icon: Icon(Icons.add),
            onPressed: () {
                            // 이벤트 호출
              countBloc.add();
            },
          ),
          IconButton(
            icon: Icon(Icons.remove),
            onPressed: () {
              countBloc.subtract();
            },
          ),
        ],
      ),
    );
  }
}

count_bloc - skip event 비즈니스 로직 처리

import 'dart:async';

class CountBloc {
  int _count = 0;
  final StreamController<int> _countSubject = StreamController<int>.broadcast();
  Stream<int> get count => _countSubject.stream;

  add() {
    _count++;
    _countSubject.sink.add(_count);
  }

  subtract() {
    _count--;
    _countSubject.sink.add(_count);
  }

  dispose() {
    _countSubject.close();
  }
}

참고

https://www.youtube.com/watch?v=AY6i0a4BM7o 


728x90

final 과 const 변수 이해하기

변수

void main(){
    int age;
    age = 20;
}

변수 age의 역할은 20이라는 숫자가 저장된 위치를 포인트 즉, 가리키고 있는 것

20이 저장된 위치의 주소를 저장하고 있는 것이 변수

제어자

final과 const 같은 keyword를 modifier 제어자 라고 함

제어자는 클래스, 변수, 함수를 정의할때 함께 쓰여서 이것들을 사용하기 위한 옵션을 정의해주는 역할

void main(){
    final int myFinal = 30;
    const int myConst = 70;
}

접근제어자

final,const : 변수 값이 한번 초기화되면 바꿀 수 없게 하는 것

void main(){
    final int myFinal = 30;
    const int myConst = 70;

    myFinal = 20; // 에러
    myConst = 50; // 에러
}

final 변수 초기화

  1. 선언할때 초기화
void main(){
    final int myFinal = 30;
}
  1. 객체 생성시에 외부데이터를 받아 생성자를 통해 초기화
class Person {
    final int age;
    String name;

    Person(this.age, this.name);
}

void main(){
    Person p1 = new Person(21, 'Tom'); // 생성자를 통해 할당 -> 이후로 age는 변경 불가
    print(p1.age); // 21
} 

2번이 가능한 이유

final은 초기화되는 시점이 앱이 실행되는 시점이기 때문 ⇒ run time constant

response 변수는 컴파일시에 초기화 되지 않고 앱이 실행된 후 웹 상에서 데이터가 전송될 때까지 기다렸다가 그 후에 값이 저장

Const

compile-time constant는 컴파일 시에 상수가 됨

const 변수는 선언과 동시에 초기화

void main(){
    const time = DateTime.now() // 에러
}

현재 시간은 매번 호출될 때마다 그 값이 변경되기 때문에 런타임시에 값이 지정되어야하므로 const 키워드는 오류 발생

정리

  1. const 변수는 컴파일 시에 상수화
  2. final 변수는 런타임 시에 상수화
  3. Compile-time constant = Run-time constant
    컴파일 시에 상수화는 런타임에도 상수화가 유지됨을 의미
  4. final 변수는 rebuild 될 수 있음

참고

https://www.youtube.com/watch?v=akc51-j84os&list=PLQt_pzi-LLfoOpp3b-pnnLXgYpiFEftLB&index=6


728x90

'Study > Dart' 카테고리의 다른 글

[Dart] factory 패턴  (0) 2021.06.24
[Dart] future, async, await, 실행순서  (0) 2021.06.15
[Dart] Future, Isolate  (0) 2021.06.08
[Dart] 상속을 쓰는 이유  (0) 2021.06.07
[Dart] 상속  (0) 2021.06.07

Rendering 조건

stateful widget에서 rebuild를 초래하는 것은 state 클래스이며 이를 통해 스크린을 랜더링함

  • child 위젯의 생성자를 통해서 새로운 데이터가 전달될때
  • internal state가 바뀔때

왜 StatefulWidget 클래스는 두개로 이루어져 있을까?

class MyApp extends StatefulWidget {
  const MyApp({Key? key}) : super(key: key);

  @override
  _MyAppState createState() => _MyAppState();
}

class _MyAppState extends State<MyApp> {
  @override
  Widget build(BuildContext context) {
    return MaterialApp(
      title: 'Charactor card',
      home: MyPage(),
    );
  }
}

먼저, StatefulWidget클래스는 아래와 같이 widget 클래스를 상속하고 있습니다.

abstract class StatefulWidget extends Widget {
  const StatefulWidget({ Key? key }) : super(key: key);
  @override
  StatefulElement createElement() => StatefulElement(this);
  @protected
  @factory
  State createState(); // ignore: no_logic_in_create_state, this is the original sin
}

widget클래스는 기본적으로 immutable 즉, 한번 생성되면 state가 변하지 않습니다.

그렇기에 StatefulWidget은 StatelessWiget처럼 immutable한 위젯입니다.

그러나 반드시 statefulwidget은 state의 변화를 반영해야 합니다.

이런 문제를 해결하기 위해 두개의 클래스로 나눠 StatefulWidget인 MyApp 위젯은 immutable한 특징을 유지하고 _MyAppState 클래스는 mutable한 속성을 대신하게 만든 것입니다.

어떻게 두개의 클래스를 연결시킬 수 있을까 - 1

먼저, state 클래스의 코드입니다.

@optionalTypeArgs
abstract class State<T extends StatefulWidget> with Diagnosticable {
  ...
}

State클래스는 제네릭 타입으로 어떤 타입이 오든지 StatefulWidget을 상속받게 하고 있습니다.

_MyAppState 클래스는 state클래스를 상속 받았고 이제, _MyAppState 클래스는 state 타입이 되었습니다.

class _MyAppState extends State<MyApp>{...}

그리고 상속 받은 state클래스의 제네릭 타입을 MyApp 클래스로 지정해준다면 이 state 클래스는 오직 MyApp타입만을 가질 수 있게 됩니다.

이를 통해 _MyAppState 클래스가 StatefulWidget인 MyApp 위젯에 연결된다고 flutter에 알려줄수 있습니다.

왜 state 클래스는 제네릭 타입을 가지게 되었을까

제네릭 타입의 장점인 코드의 재사용성, 안정성 때문입니다.

check box

Checkbox(value: false, onChanged: (value){})

check box source code

// StatefulWidget을 상속 받고 있음
class Checkbox extends StatefulWidget {
    const Checkbox({...})
    ...
}
// 상속받은 state의 제네릭 타입은 checkbox 타입으로 되어있음
class _CheckboxState extends State<Checkbox> with TickerProviderStateMixin, ToggleableStateMixin {...}

즉, state클래스를 제네릭 타입으로 만들어서 필요한 타입을 편하게 지정하고 그 외의 타입을 전달 받지 못하도록 안전장치를 해둔 것

어떻게 두개의 클래스를 연결시킬 수 있을까 - 2

이제, _MyAppState 클래스를 createState Method를 통해 MyApp 위젯 내에서 불러와야합니다.

class MyApp extends StatefulWidget {
  const MyApp({Key? key}) : super(key: key);

  @override
  State<StatefulWidget> createState() {
    return _MyAppState();
  }
}
class _MyAppState extends State<MyApp> {
  @override
  Widget build(BuildContext context) {
    return MaterialApp(
      title: 'Charactor card',
      home: MyPage(),
    );
  }
}

createState Method는 state 타입으로 지정되어 있고 제네릭 타입으로 StatefulWidget이 지정되어 있습니다.

즉, createState Method는 반드시 state 타입의 객체를 리턴해야 하는데 결국, StatefulWidget타입만이 올 수있는 객체여야 하며 이 객체는 _MyAppState 클래스에 근거하여 만들어진 것입니다.

StatefulWidget과 StatelessWidget 차이

createState Method는 StatefulWidget이 생성될 때 마다 호출되는 메서드입니다.

StatelessWidget은 build method에서 생성한 객체를 바로 반환하지만 StatefulWidget은 이 createState Method에서 생성한 객체를 반환합니다.

이제 어떻게 State를 변화시켜 랜더링 시킬까

state를 변화시킬려면 반드시 build 메서드를 호출해서 위젯을 rebuild하는 방법 뿐입니다.

단순히 버튼을 누른다고 build메서드를 호출할 수는 없습니다.

TextButton(
  onPressed: () {
      counter++;
  },
  child: Icon(Icons.add),
)

그래서, flutter는 우리 대신 build 메서드를 호출해 줄 수 있는 setState 메서드를 가지고 있습니다.

setState의 역할은 두가지 입니다.

  • 매개 변수로 전달된 함수 호출
  • build 메서드 호출
TextButton(
  onPressed: () {
    setState((){
      counter++;
    })
  },
  child: Icon(Icons.add),
)

정리

flutter는 widget tree를 기반으로 element tree를 생성합니다.

MyApp Stateful widget을 만나면 관련된 MyApp Stateful element를 추가하지만 createState 메서드를 호출해서 MyApp Stateful element와 연결된 MyAppState 객체도 생성합니다.

그런데 이 객체는 MyApp Stateful widget과 간접적으로만 연결되어 있습니다.

여기서 특이점은 MyApp Stateful element는 위젯 관련 중요 정보들을 가지고 있지만, 메모리 상에서 어디에도 종속되지 않는 독립된 객체로서 MyAppState 객체에 대한 정보도 가지게 되는 것입니다.

이제 setState메서드가 호출되고 build 메서드로 인해서 state객체가 rebuild 되면서 새로운 state를 반영한 새로운 MyApp Stateful widget이 rebuild 됩니다. 그러면 MyApp Stateful element에 연결되어 있는 MyAppState객체에 새로운 state가 저장이 되고 이제 MyAppState객체는 새롭게 rebuild된 MyAppStateful widget을 가리키게 됩니다.

왜 MyAppState 객체는 MyAppStateful widget처럼 widget tree상에서 매번 rebuild되지 않는 것일까?

비용문제

state가 변한 state 객체를 비용이 싼 Stateful widget으로 만들어서 계속 rebuild하고 MyAppState 객체는 element tree에서 mutable하게 존재하면서 필요할때마다 새로운 state를 저장함과 동시에 새롭게 rebuild된 Stateful Widget과의 링크만을 업데이트 해줍니다.

참고

https://www.youtube.com/watch?v=OvWrOKMqSG0&list=PLQt_pzi-LLfoOpp3b-pnnLXgYpiFEftLB&index=2 


728x90

'Study > Flutter' 카테고리의 다른 글

[Flutter] Factory 패턴  (0) 2021.07.13
[Flutter] Provider pattern (bloc -> provider )  (0) 2021.06.16
[UI초급] Container, materialApp, Scaffold  (0) 2021.06.07

TextField안의 상단에 prefix 넣기

custom_form_field.dart

import 'package:flutter/material.dart';

import '../constants.dart';

class CustomFormField extends StatelessWidget {
  const CustomFormField({
    Key? key,
  }) : super(key: key);

  @override
  Widget build(BuildContext context) {
    return Stack(
      children: [
        TextFormField(
            textAlignVertical: TextAlignVertical.bottom,
            decoration: InputDecoration(
                contentPadding: EdgeInsets.only(top: 30, left: 20, bottom: 10),
                hintText: "근처 추천 장소",
                border: OutlineInputBorder(
                  borderRadius: BorderRadius.circular(10),
                ))),
        Positioned(
          left: 20,
          top: 8,
          child: Text(
            "위치",
            style: kTextFormBody2Style,
          ),
        ),
      ],
    );
  }
}

설명

Stack안에 

TextFormField를 디자인하고 

position을 통해 prefix를 디자인 해준다.


728x90

키보드 높이 만큼 페이지 이동(동적스크롤링)

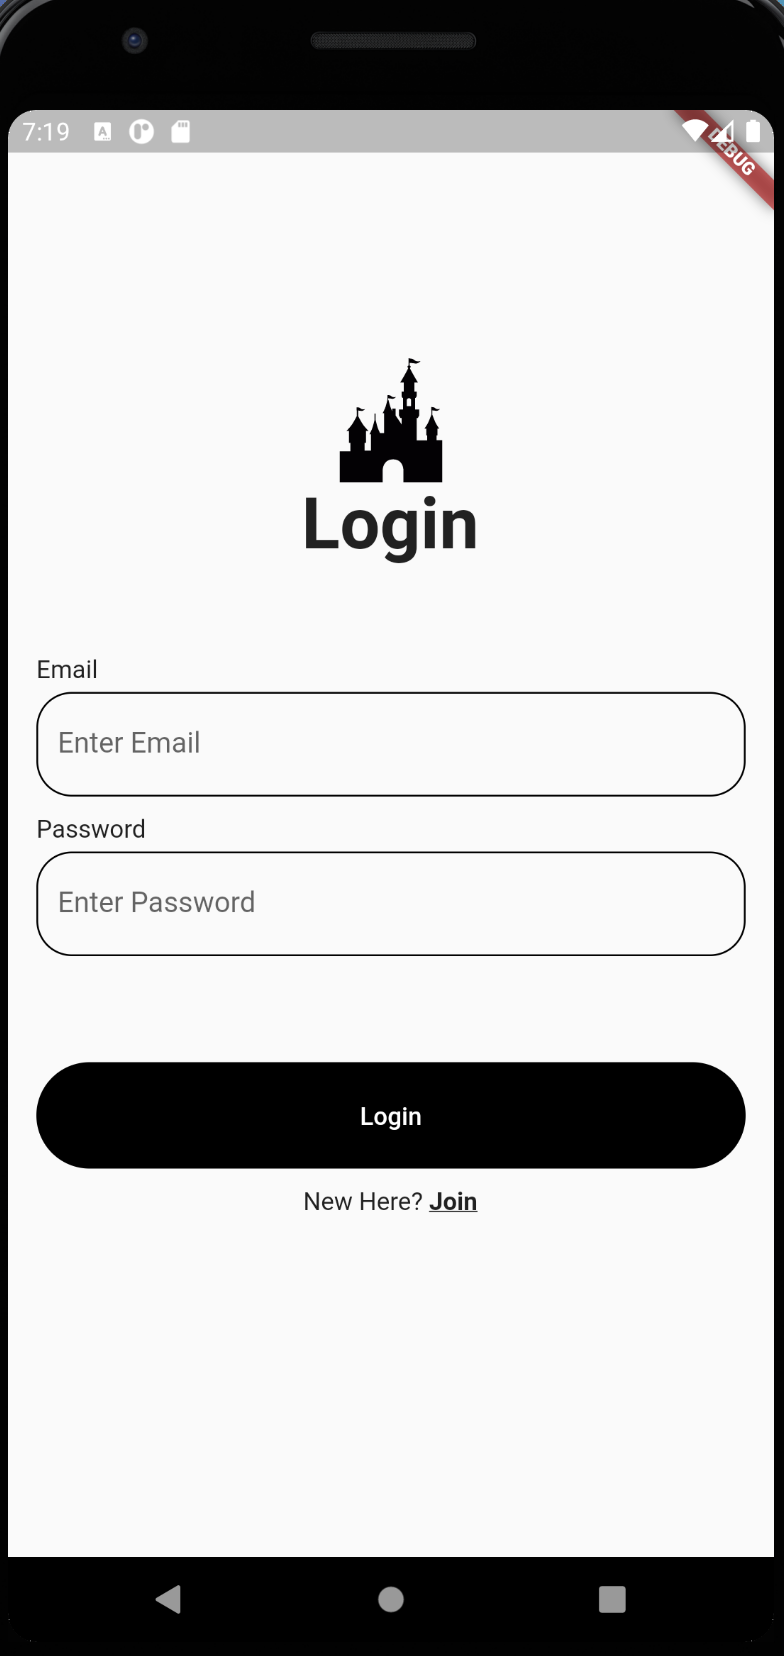
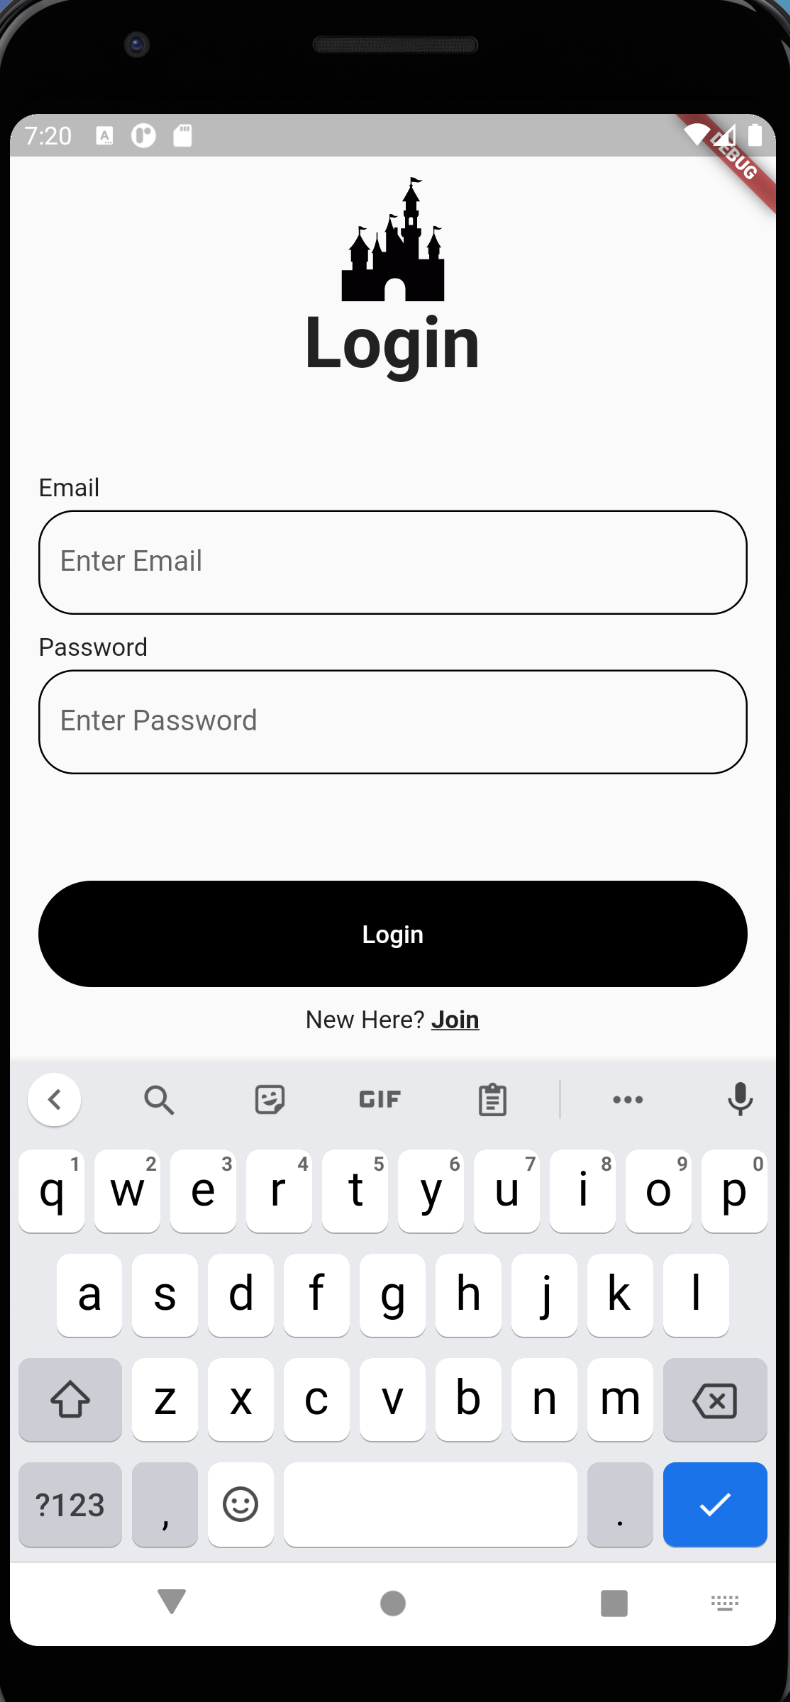
pages / login_page.dart

CustomTextFormField에 scrollAnimate 함수 넘겨줌

// statefulwidget으로 변경
class LoginPage extends StatefulWidget {
  @override
  _LoginPageState createState() => _LoginPageState();
}

class _LoginPageState extends State<LoginPage> {
  final _formKey = GlobalKey<FormState>();
  //scrollController 생성
  late ScrollController scrollController;

  @override
  void initState() {
    // TODO: implement initState
    super.initState();
    //초기화
    scrollController = new ScrollController();
  }

  @override
  Widget build(BuildContext context) {
    return Scaffold(
      body: Padding(
        padding: const EdgeInsets.all(16.0),
        child: ListView(
          controller: scrollController,
          children: [
            SizedBox(height: 100),
            Logo("Login"),
            SizedBox(height: 50),
            buildLoginForm(),
            SizedBox(height: 50),
            TextButton(
              onPressed: () {
                if (_formKey.currentState!.validate()) {
                  Navigator.pushNamed(context, "/home");
                }
              },
              child: Text("Login"),
            ),
            SizedBox(height: 10),
            Row(
              mainAxisAlignment: MainAxisAlignment.center,
              children: [
                Text("New Here? "),
                GestureDetector(
                  onTap: () {
                    print("Join 클릭");
                  },
                  child: Text(
                    "Join",
                    style: TextStyle(
                      fontWeight: FontWeight.bold,
                      decoration: TextDecoration.underline,
                    ),
                  ),
                )
              ],
            ),
          ],
        ),
      ),
    );
  }

  Widget buildLoginForm() {
    return Form(
      key: _formKey,
      child: Column(
        children: [
          CustomTextFormField("Email", scrollAnimate),
          CustomTextFormField("Password", scrollAnimate),
        ],
      ),
    );
  }

  void scrollAnimate() {
    print("탭 클릭됨");
    // 6초 후에 실행
    Future.delayed(Duration(milliseconds: 600), () {
      // MediaQuery.of(context).viewInsets.bottom 하단 inset(사용못하는영역)크기 리턴
      // 사용못하는 영역만큼 1초 동안 easeIn으로 이동
      scrollController.animateTo(MediaQuery.of(context).viewInsets.bottom,
          duration: Duration(milliseconds: 100), curve: Curves.easeIn);
    });
  }
}

components / custom_text_form_field.dart

import 'package:flutter/material.dart';

class CustomTextFormField extends StatelessWidget {
  final String subtitle;
  //scrollAnimate 함수 받아오기
  final Function scrollAnimate;
  const CustomTextFormField(this.subtitle, this.scrollAnimate, {Key? key})
      : super(key: key);

  @override
  Widget build(BuildContext context) {
    return Column(
      crossAxisAlignment: CrossAxisAlignment.start,
      children: [
        Text(subtitle),
        SizedBox(height: 5),
        TextFormField(
          onTap: () {
          // text field tab할때 실행
            scrollAnimate();
          },
          validator: (value) =>
              value!.isEmpty ? "Please Enter some text" : null,
          decoration: InputDecoration(
            hintText: "Enter $subtitle",
            focusedBorder: OutlineInputBorder(
              borderRadius: BorderRadius.circular(20),
            ),
            enabledBorder: OutlineInputBorder(
              borderRadius: BorderRadius.circular(20),
            ),
            errorBorder: OutlineInputBorder(
              borderRadius: BorderRadius.circular(20),
            ),
            focusedErrorBorder: OutlineInputBorder(
              borderRadius: BorderRadius.circular(20),
            ),
          ),
        ),
        SizedBox(height: 10),
      ],
    );
  }
}


728x90

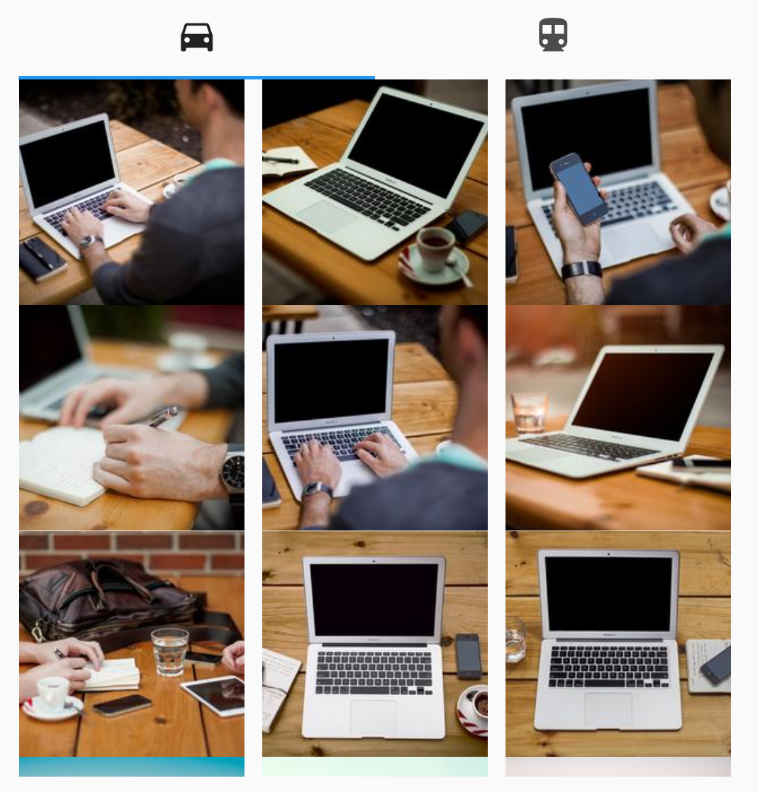
Tab menu 구현

main.dart

class MyApp extends StatelessWidget {
  @override
  Widget build(BuildContext context) {
    return MaterialApp(
      theme: ThemeData(
        primaryColor: Colors.white,
        appBarTheme: AppBarTheme(
          iconTheme: IconThemeData(color: kColor1),
        ),
      ),
      home: Profile(),
    );
  }
}

// TabController 객체를 멤버로 만들어서 상태를 유지하기 때문에 StatefulWidget 클래스 사용
class Profile extends StatefulWidget {
  @override
  _ProfileState createState() => _ProfileState();
}

// SingleTickerProviderStateMixin 클래스는 애니메이션을 처리하기 위한 헬퍼 클래스
// 상속에 포함시키지 않으면 탭바 컨트롤러를 생성할 수 없다.
// mixin은 다중 상속에서 코드를 재사용하기 위한 한 가지 방법으로 with 키워드와 함께 사용
class _ProfileState extends State<Profile> with SingleTickerProviderStateMixin {
//tab controller 생성
  late TabController _tabController;
  @override
  void initState() {
    // TODO: implement initState
    super.initState();
    //tabcontroller 초기화
    //vsync에 this를 넣기위해 initState안에서 초기화
    _tabController = new TabController(length: 2, vsync: this);
  }

  @override
  Widget build(BuildContext context) {
    return Scaffold(
      body: Padding(
        padding: const EdgeInsets.all(15.0),
        child: Column(
          children: [
            TabBar(
              controller: _tabController,
              tabs: [
              	//첫번째 tab menu
                Tab(icon: Icon(Icons.directions_car)),
              	//두번째 tab menu               
                Tab(icon: Icon(Icons.directions_transit)),
              ],
            ),
            Expanded(
              child: TabBarView(
                controller: _tabController,
                //tab content
                children: [
                  // 첫번째 tab menu content
                  GridView.builder(
                    gridDelegate: SliverGridDelegateWithFixedCrossAxisCount(
                      crossAxisCount: 3,
                      crossAxisSpacing: 10,
                    ),
                    itemBuilder: (context, index) {
                      return Image.network(
                          "https://picsum.photos/id/${index + 1}/200/200");
                    },
                  ),
                  // 두번째 tab menu content
                  Image.asset("assets/tab1.jpeg"),
                ],
              ),
            )
          ],
        ),
      ),
    );
  }
}

참고

https://www.youtube.com/watch?v=8B2uPE4lSeE&list=PL93mKxaRDidG6CYF5M_RbOXGkAGLtM_Ct&index=8 


728x90

+ Recent posts